

Forms
PDF forms require three primary considerations to ensure accessibility:
- Form fields are tagged
- Form fields follow a logical order
- Form fields are properly labeled
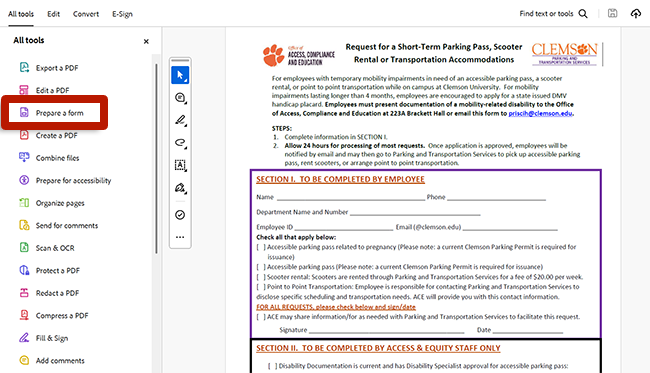
Acrobat's Prepare Form tool is used to manage form fields. To open the tool, select Prepare a form in the Tools menu.
Before you begin, verify that you are working with a fully tagged PDF using Acrobat's Accessibility Check. Any form placeholders (e.g., repeating underscores) should be marked as artifacts.
This guide focuses on managing forms using the New Acrobat experience. For guidance on accessible forms using the Old Acrobat interface, visit the Adobe Acrobat Accessibility Series.
Creating Form Fields
Automatically Detect Form Fields
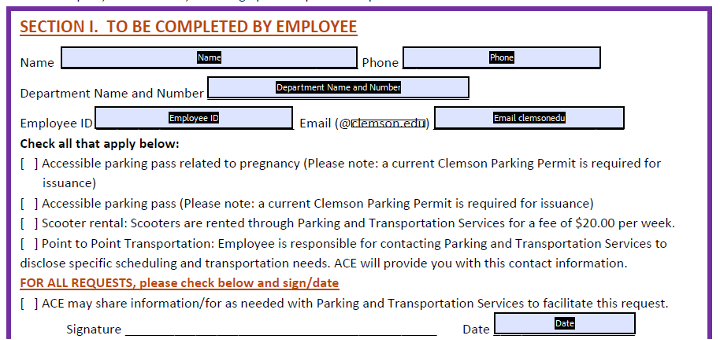
When documents have form placeholders (typically indicated by repeating underscores), Acrobat can automatically detect and create interactive form fields.
Caution
Automatic detection may not identify all fields, and it may identify some fields as the incorrect type (e.g., a checkbox instead of a radio button.) Finalizing the form structure may require manual updates.
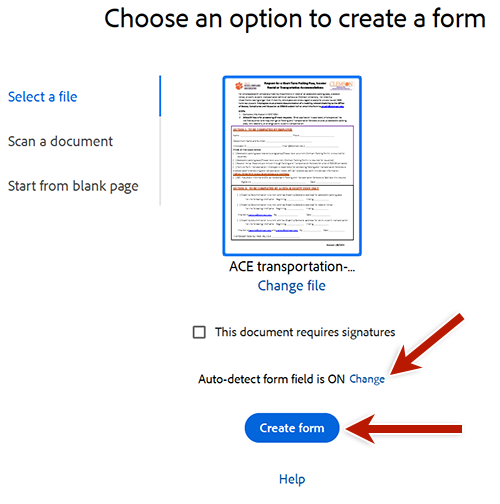
To automatically detect form fields:
- Open the Prepare Form tool.
- Select a source file.
- If "auto-detect form field" is off:
- Select Change to open Forms settings.
- In the General section, check Automatically detect Form fields.
- Select OK.
- Select Create form.
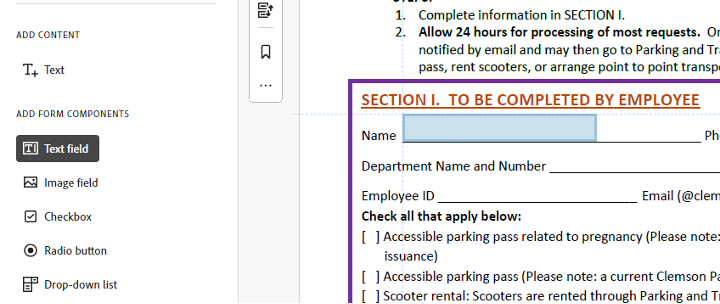
Manually Create Form Fields
To create a new field, select the form component you wish to use from the Prepare Form tool. Using the mouse, click where the field should be placed in the document. Press the Escape key when finished to exit form field placement. (You may need to press Escape more than once.)
Manage Form Fields
The Prepare Form tool provides several features to manage forms:
- Right-click a form field and select Properties from the context menu to customize the field's appearance, options, formatting and more.
- To resize a form field, drag its borders.
- To move a form field, drag-and-drop it to a new location, or nudge it by selecting the field with the mouse and using the arrow keys on the keyboard.
- To manage multiple fields at once, draw a box around the fields by clicking and dragging with the mouse. Alternatively, hold the Control key (Windows) or Command key (Mac) while selecting multiple fields.
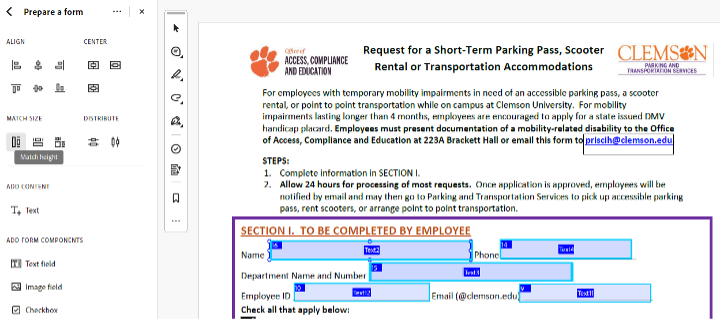
- With multiple fields selected, use the Align, Match Size and Distribute features for consistent size and placement.
- To delete a form field, select it using the mouse and press the Delete key.
- To clear a form, select the options (three dots) menu in the Fields side panel and choose Clear form.
Form Order
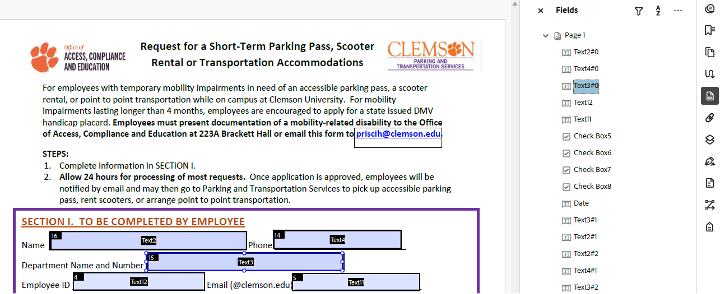
Review and update the order of the form fields to ensure keyboard focus is logical:
- Open the Prepare Form tool.
- In the Fields side panel, drag-and-drop fields into a logical order, matching the visual order in the document.
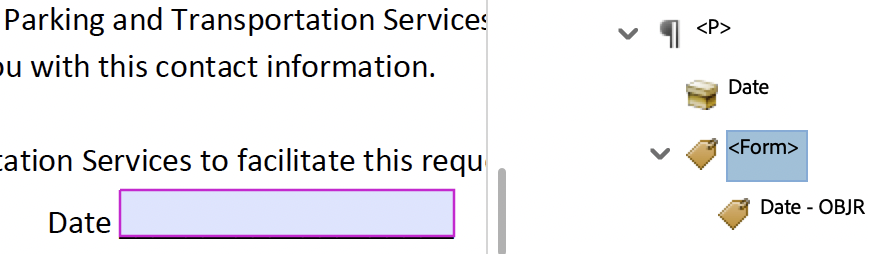
Form Tags
Once all form fields are present in the document in a logical order, ensure they are tagged:
- Open the Accessibility Tags
 side panel.
 - Select the Tags element at the root of the tag tree. New form tags will be placed at the end of the tag tree. (If a different tag is selected, any new tags will be placed under it.)
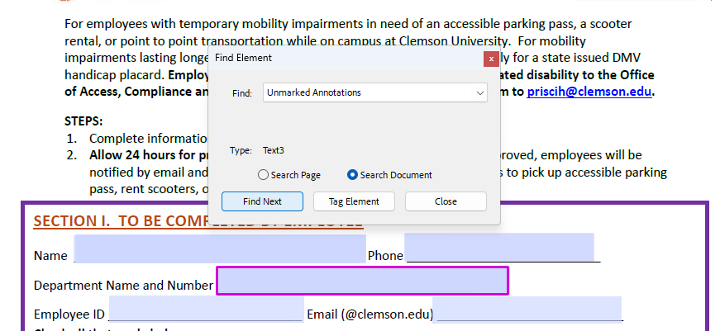
- Select the Options menu in the Accessibility Tags side panel.
- Select Find.
- Select Unmarked Annotations in the Find dropdown.
- Select Search Document.
- Select the Find button.
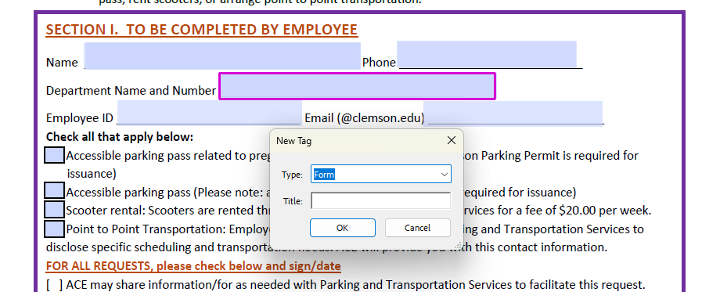
- When an untagged form field is found, indicated by a highlighted border on the field, select Tag Element.
- For Type, select Form and press OK.
- Acrobat will add the Form tag to the end of the tag tree. The Form tag will contain its object reference.
- The Find tool will move to the next untagged element.
- Repeat steps 8 and 9 until all form fields are tagged.
Finally, move the Form tags to their logical positions in the tag tree, typically nested within a paragraph tag containing the text label in the document.
Form Labels
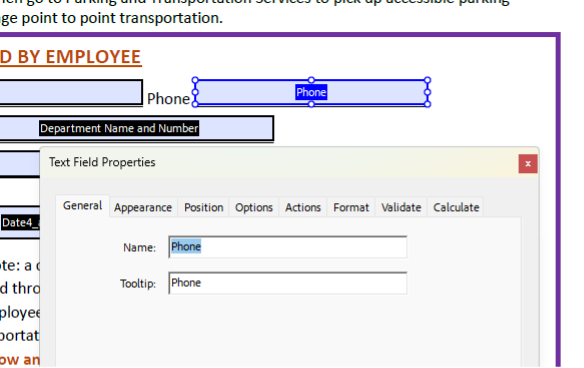
Ensure all form fields have a name and a tooltip. Right-click a field and select Properties from the context menu. In the General tab of the field properties dialog, provide a Name and a Tooltip. Tooltips are announced to screen readers. Provide a tooltip that communicates the field's label.
Repeat for each field in the form.
Field Formats
Using the Format tab in the field properties dialog, authors can require specific formats. If a specific format is required, indicate the format in the tooltip. For example, for a birthday field using the mm/dd/yyyy date format, the tooltip should be "Birthday (mm/dd/yyyy)".
Radio Buttons
Radio buttons allow selecting only one of a group of options. They are grouped by their name. Use the same name and tooltip for each radio button in a group.
Specify each individual radio button's label:
- With the Prepare Form tool open, right-click a radio button and select Properties... from the context menu to open the Radio Button Properties dialog.
- Select the Options tab.
- Enter the radio button's label in the Radio Button Choice field.
- Repeat for each radio button.
Alternatively, update the label directly in the Fields side panel:
- Select a radio button in the Fields side panel. Once the radio button is highlighted, click its text to edit the label.
Alternatively, right-click a field and select "Rename" from the context menu. - Type the label and press Enter.
Tip: Create Multiple Copies
When creating a group of radio buttons, save time by creating multiple copies.
- Start by creating only the first radio button.
- Set its name and tooltip.
- In the Fields side panel, with the radio button field selected, open the options (three dots) menu and select Create multiple copies...
- Modify the total number of fields, their size and position as desired.
- Select OK.
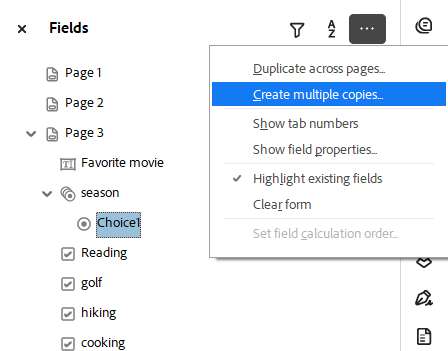
Each field will inherit the first radio button's name and tooltip. Update each radio button's Radio Button Choice.
